DIY projects

How to revamp a thrifted drinks trolley

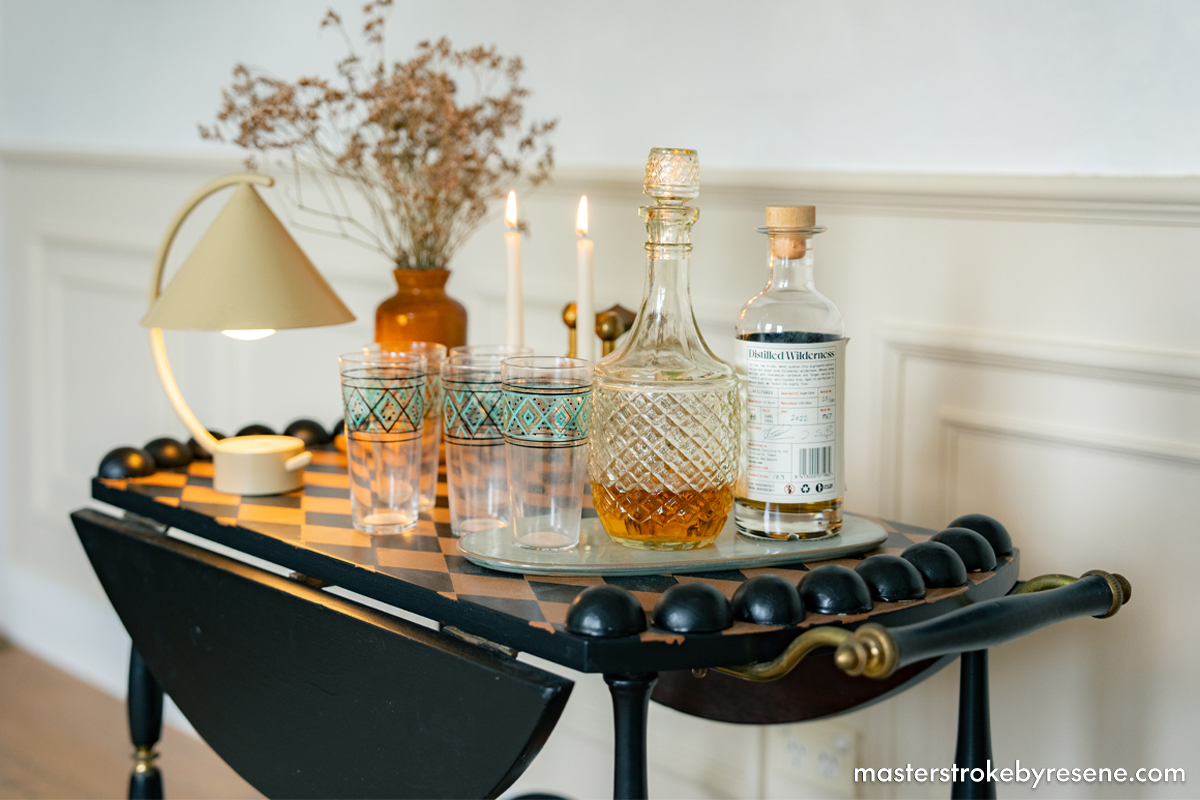
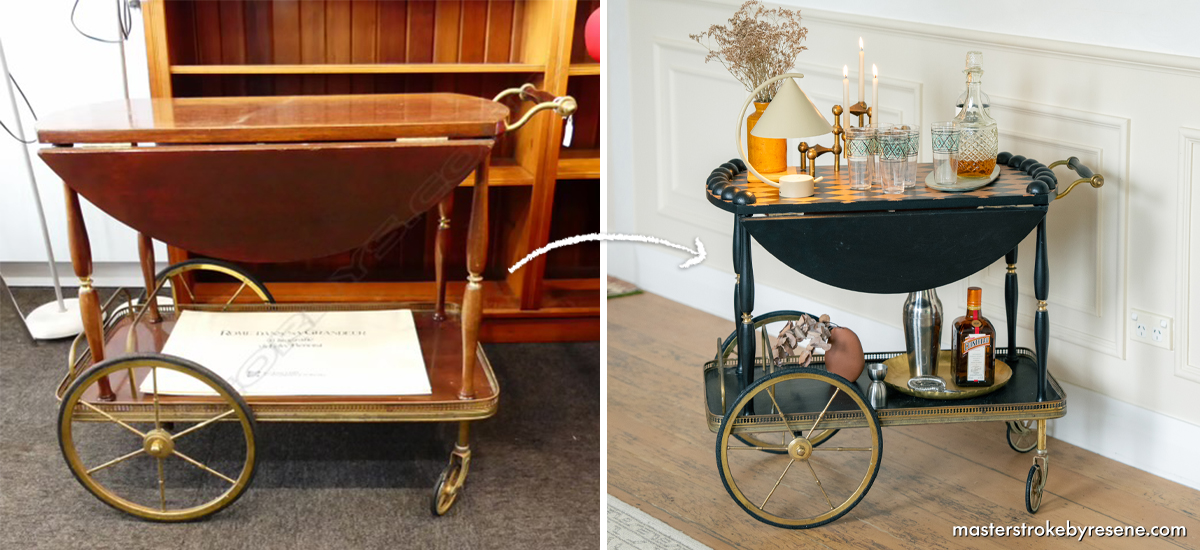
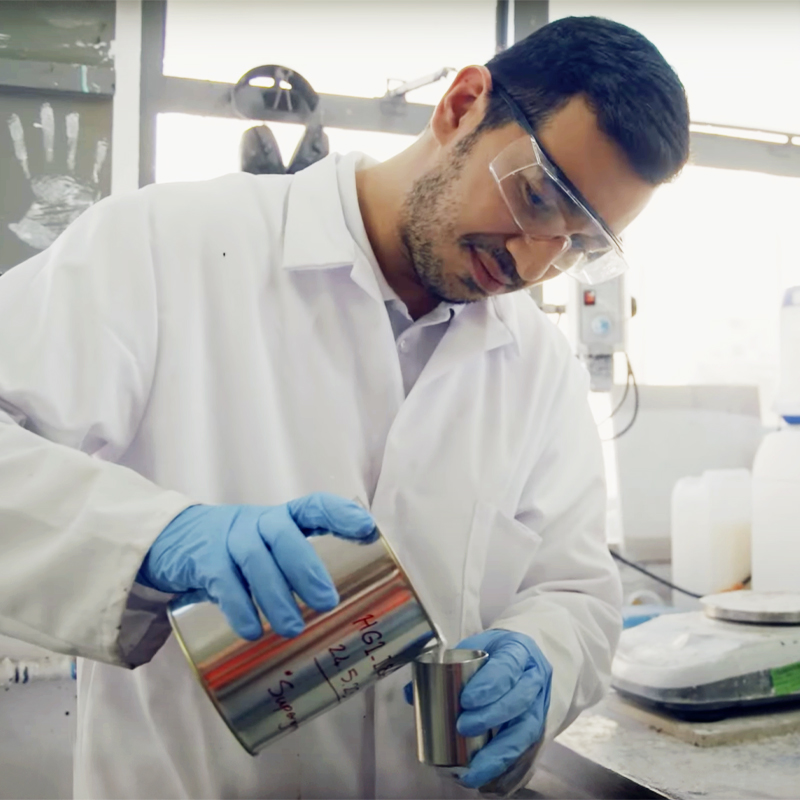
Vintage drinks trolleys are a mid-century classic that have seen a recent resurgence, and they can make a stylish addition to your home. In this inspired thrift flip, clever upcycler Gretchen Howe has given her second-hand find a fun facelift and modern twist using the power of Resene paint. 

“The inspiration came from my love of hosting and creating inviting spaces,” says Gretchen.  “I envisioned transforming it into a stylish, functional centrepiece for gatherings, blending my passion for vintage charm with a personal touch.” 

You’ll recognise Gretchen from The Do Up, in which she and her husband Blair transformed their Kingsland bungalow, as well as her other chic and colourful thrift flips – check out her birdbath side table and a record holder bookshelf. Gretchen loves colour and is not afraid to use it, and she gets a real kick out of breathing new life into much-loved pieces.  

The process of sourcing and discovering vintage items is often one of the most rewarding parts of the process – with Trade Me, Hospice shops and the Salvation Army great places to visit. Gretchen found her bar trolley at Cordy’s. Cordy’s is a premier antique, art and collectables auction house. They conduct monthly antique and art auctions, with three estate and collectable auctions in between. There’s always a vast range of unique and one-of-a-kind items to discover and be inspired by.

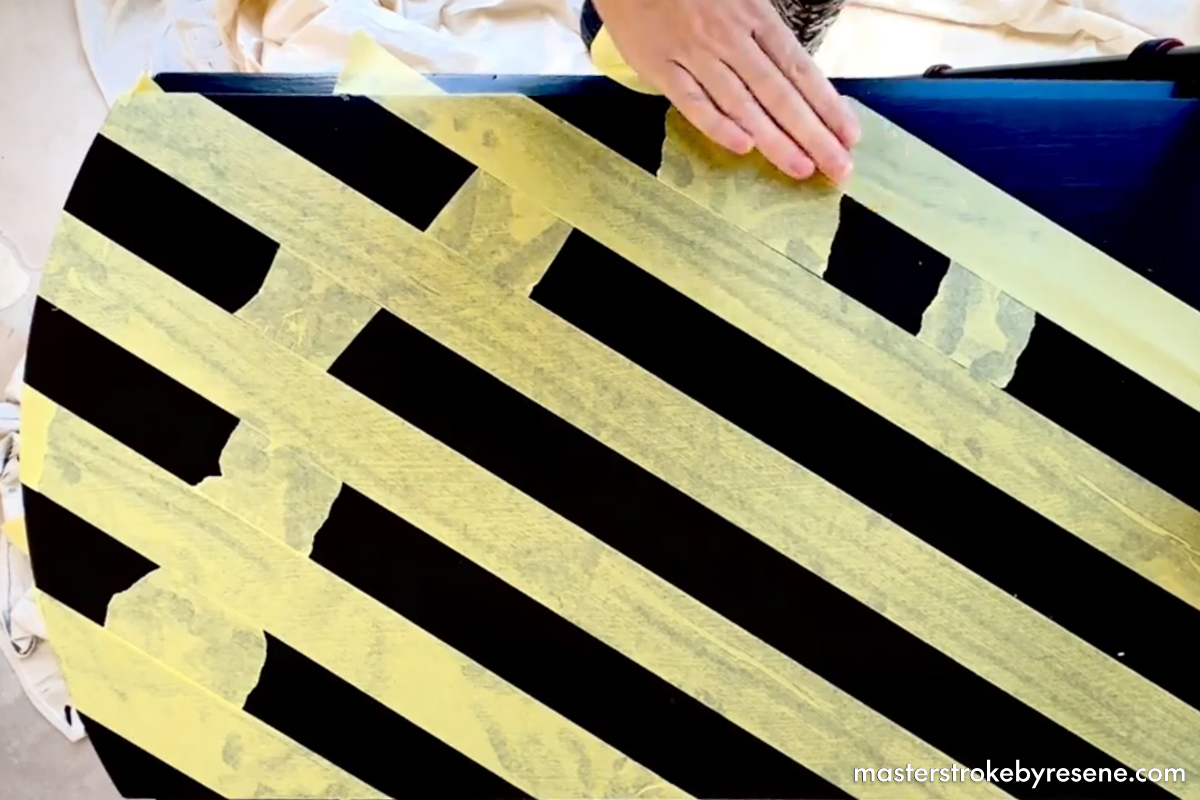
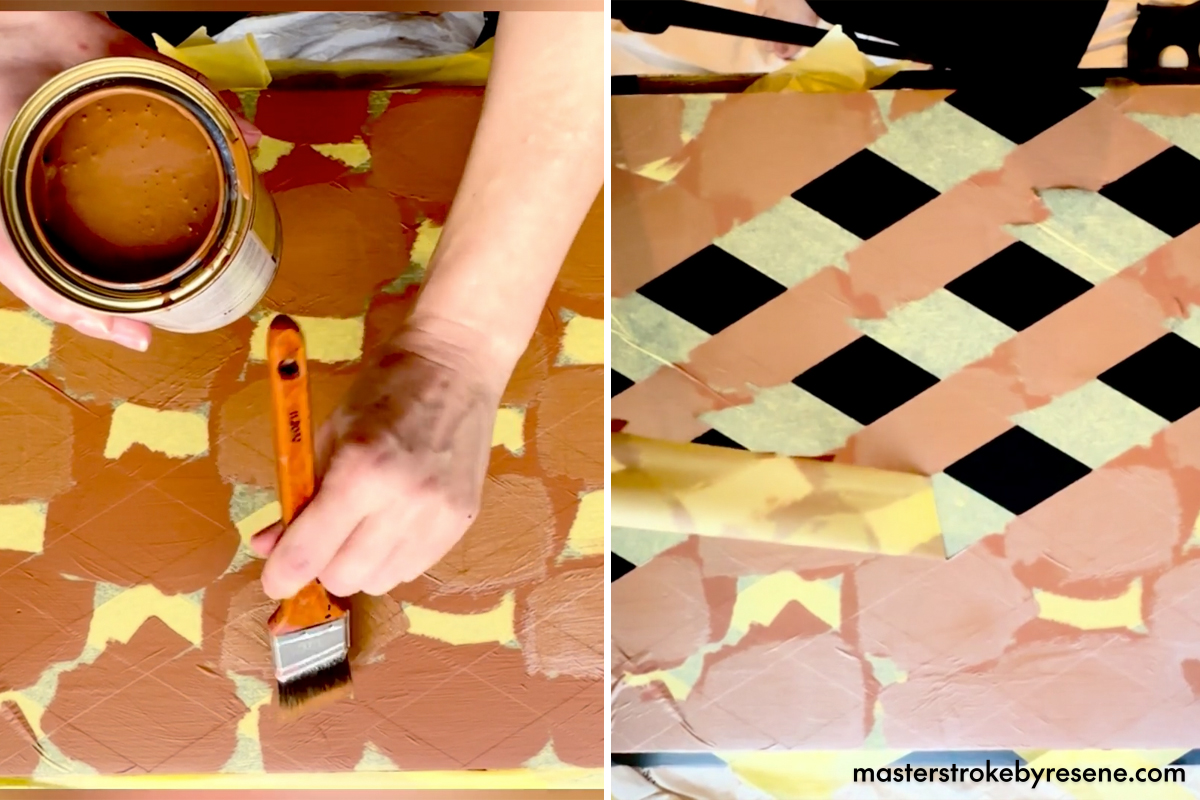
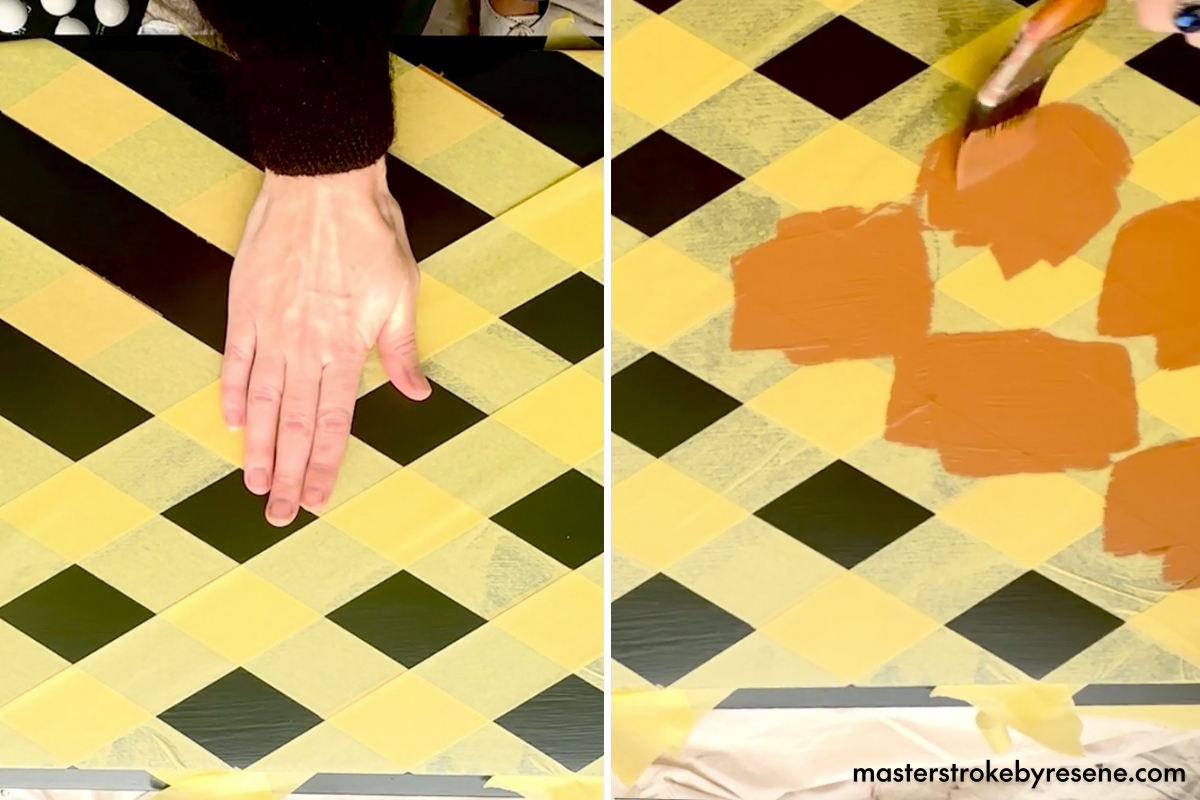
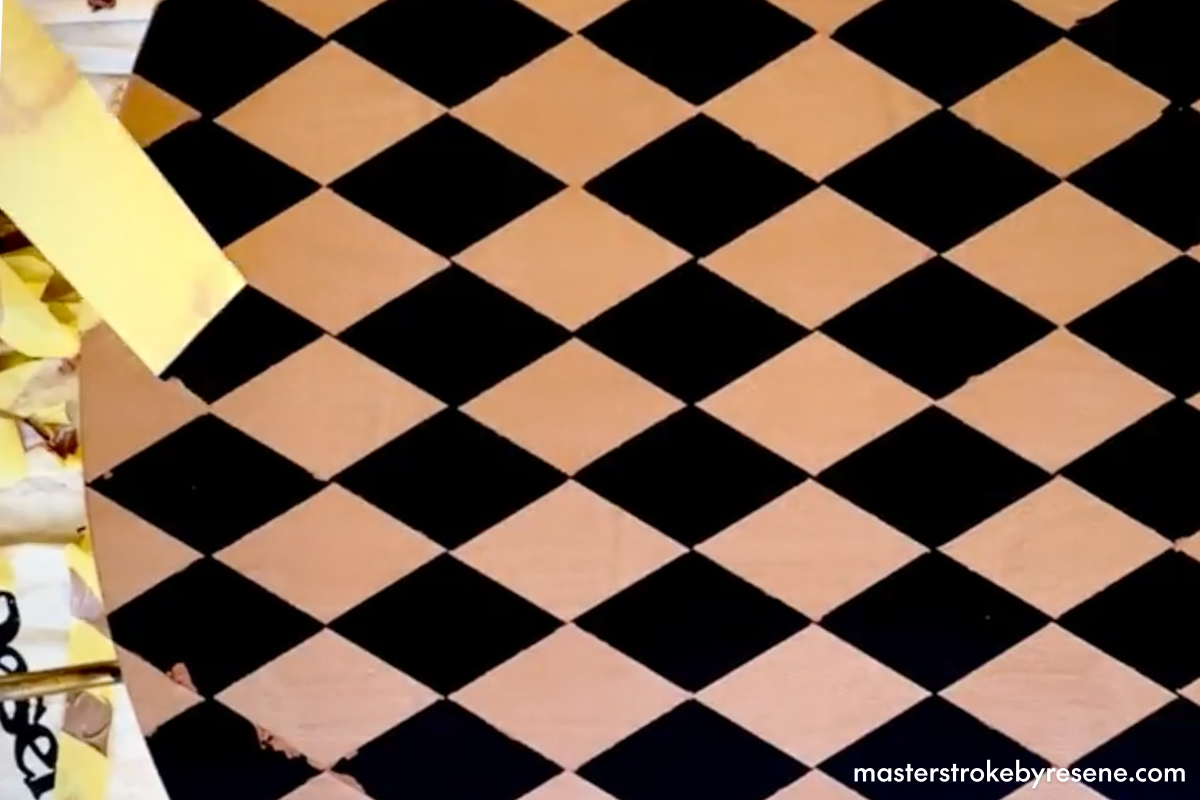
Gretchen went for a striking diamond checkerboard pattern on the top tray of the trolley using a combination of Resene Charcoal and Resene Cape Palliser, and finished the look with wooden half circles glued at each end, also painted in Resene Charcoal. 

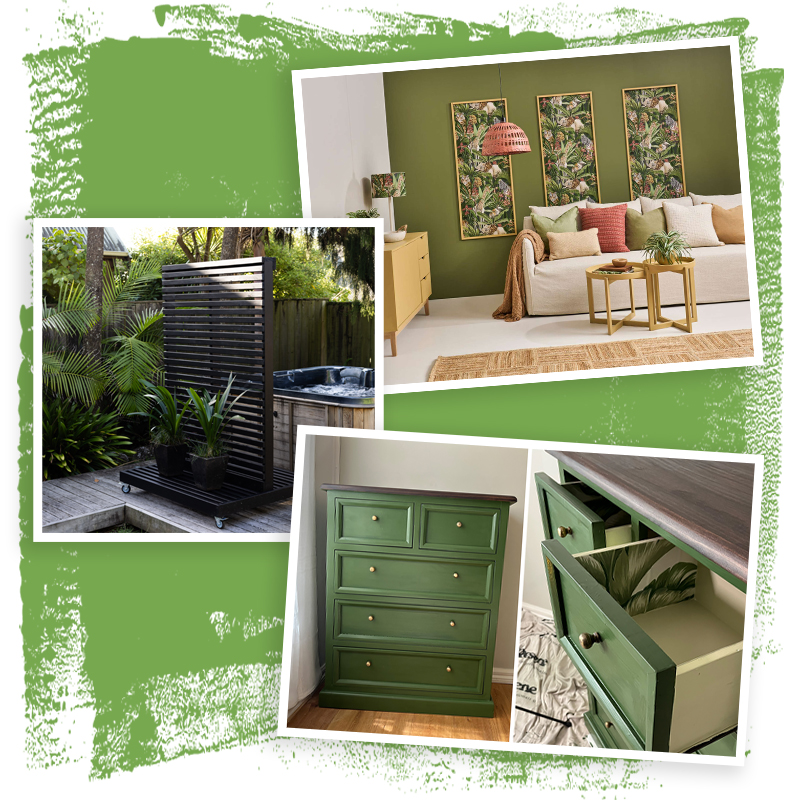
A revamped drinks trolley is a stunning furniture piece for displaying not only spirits, shakers and glassware, but any precious items you’d like to showcase – which can also all be sourced on your thrifting journeys. 

Gretchen’s best tip for anyone trying this at home? “Set a few days aside for drying time. It was a really rewarding process but took a few days. Also, use low tack painter’s tape for the checkerboard part.” 

Gretchen is absolutely thrilled with her finished product. “It’s really beautiful and glamorous, and the paints I used means any drink spills can be easily wiped down.”

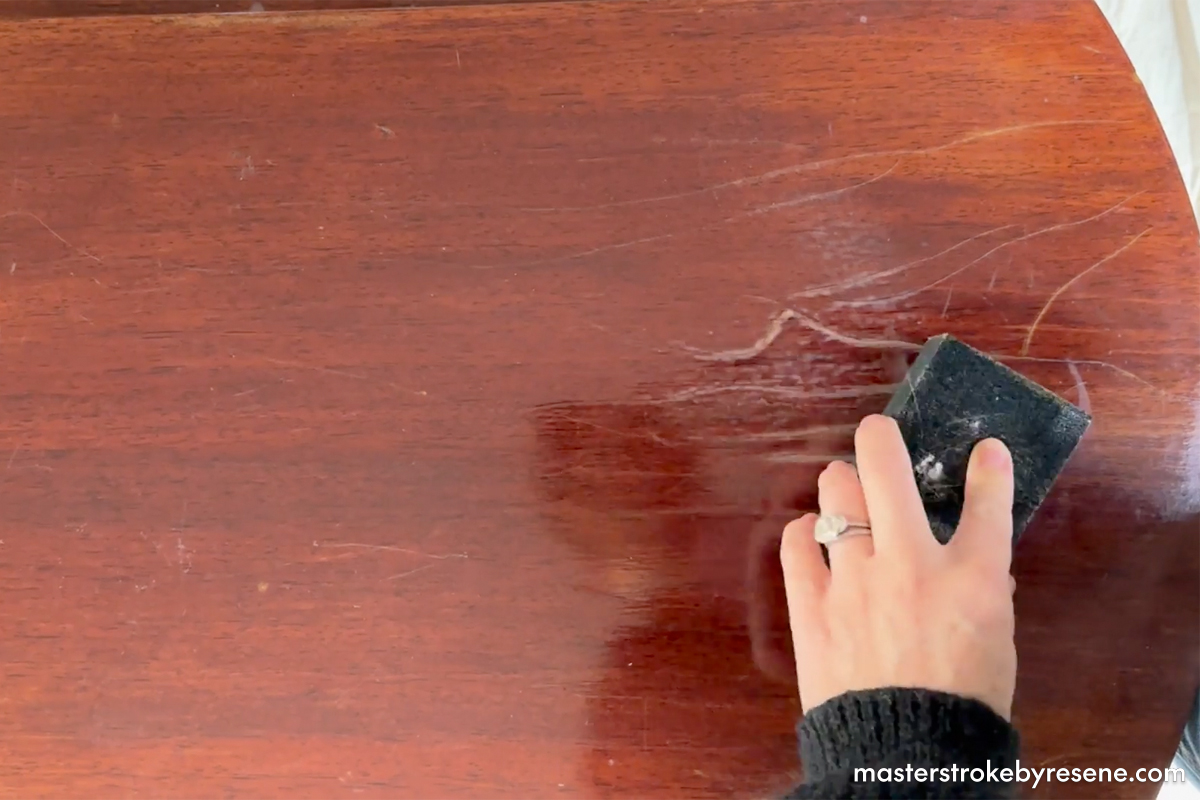
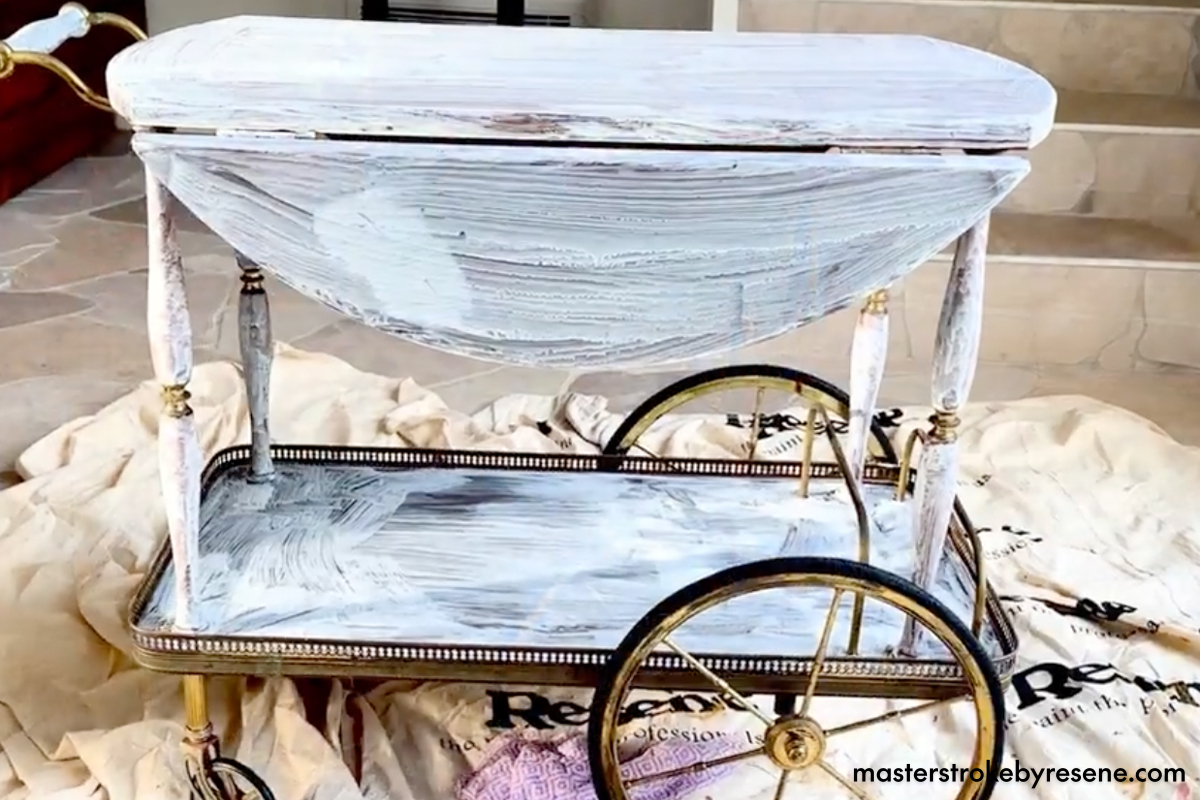
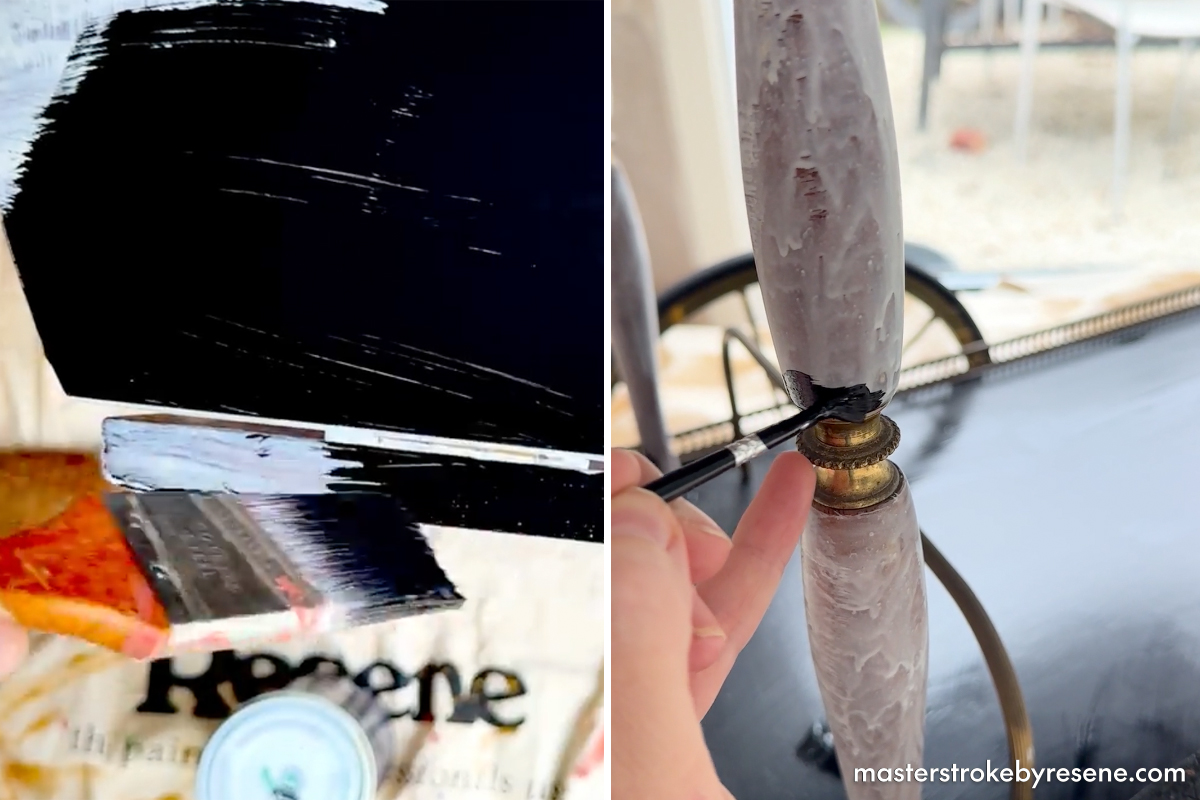
Follow these step-by-step instructions to create your own decorative drinks trolley.

1

Sand

Start by placing your drop cloth on the floor to avoid any spills, then give the timber trolley a light sand all over, focusing on any areas that are particularly scratched. Wipe away sanding dust once you’re finished.

2

Seal

Use a paintbrush and apply one coat of Resene Waterborne Sureseal to all the timber surfaces. 

Resene Waterborne Sureseal is the perfect choice for this piece as it prepares the old varnish for its new topcoat, and is also ideal for wet areas – negating the need for panic when drinks are spilled! 

Wait for it to dry before continuing.

3

Paint

Next apply two coats of Resene Lustacryl semi-gloss waterborne enamel – Gretchen chose the deep, near black colour Resene Charcoal.

Make sure to wait the appropriate drying time between coats, and use smaller brushes to paint around the detailed edges and handles.

4

Mask it up

Now it’s time to create the diamond checkerboard pattern using painter’s tape. 

Apply strips of tape diagonally in one direction first, using the width of the tape to measure the distance between each. Then go over the top in the opposite direction, using the same method to measure the width.

5

Add contrast

Apply your second contrasting colour to the untaped areas – Gretchen used Resene Cape Palliser.

Remove the tape and trim any uneven edges with a craft knife.

6

Repeat

When the first set of diamonds are dry, tape over them to create the second set. Apply your second Resene colour or you could add a third colour if you wish – Gretchen stuck with Resene Cape Palliser.

7

The big reveal

Gently remove the tape to reveal your diamond pattern.

8

Optional extras

Gretchen decided to add a bit of flair to her drinks trolley by adding some wooden half-spheres to each end.

To paint them, decant some Resene Lustacryl into a paint pot – Gretchen used Resene Charcoal – then dip the wooden half-spheres in using tongs. Allow them to dry upright on a flat surface. 

Once dry, glue them to the end of the top tray.

Top tip: If you’d like to adjust the sheen level on your finished trolley, you can apply Resene Concrete Clear over the top.

9

Job well done

Raise a glass! It’s time to put your new drinks trolley to good use. Set it up with all your entertaining needs – or simply use it to display your favourite decorative items.

Gretchen found this bar trolley at Cordy’s Auction House and decided to give it a makeover. Trolley painted in Resene Lustacryl tinted to Resene Charcoal and Resene Lumbersider Low Sheen tinted to Resene Cape Palliser, wall in an effects finish using Resene Alabaster, Resene Sea Fog and Resene Double Sea Fog and panelling in Resene Eighth Canterbury Clay.

Gretchen’s top tips for budding furniture flippers:

  • Estate sales and garage sales are also great places to find vintage items at reasonable prices.
  • Look for pieces that are well-made and have good bones. Quality materials and construction will make the upcycling process more rewarding.
  • Check for structural integrity and make any necessary repairs before painting.
  • Retain and highlight the original charm of the piece during the painting process.
  • Explore various painting techniques beyond the traditional, such as distressing or stencilling.
  • Combine vintage aesthetics with modern elements for a fresh and unique look.
  • Enhance the functionality of the item during the upcycling process.

Bring your thrift flip project idea into your local Resene ColorShop and the team can help you with advice on how to prep and paint or stain it to bring out the best in your project.

About MasterStroke by Resene
MasterStroke by Resene is here to help you master your paint and decorating DIY projects. Brush up on your skills with advice, tips and ideas from our trusted experts.

Check out the latest how-to videos on our YouTube channel.